

Recently on Instagram, I shared a photo of some crochet hexagons that I was making for a blanket. A few people sent me messages asking for a pattern so I thought a tutorial would be helpful. This is a great motif to work on and is a simple, beautiful project. Along with the tutorial, I have included some ideas on how these motifs could be used. Let’s begin:
This post contains affiliate links. This means that if you decide to purchase items through the links I have shared, I may earn a small commission (at no extra cost to you). Thank you for supporting the time and work I put into this website and pattern designing.
Materials Needed:
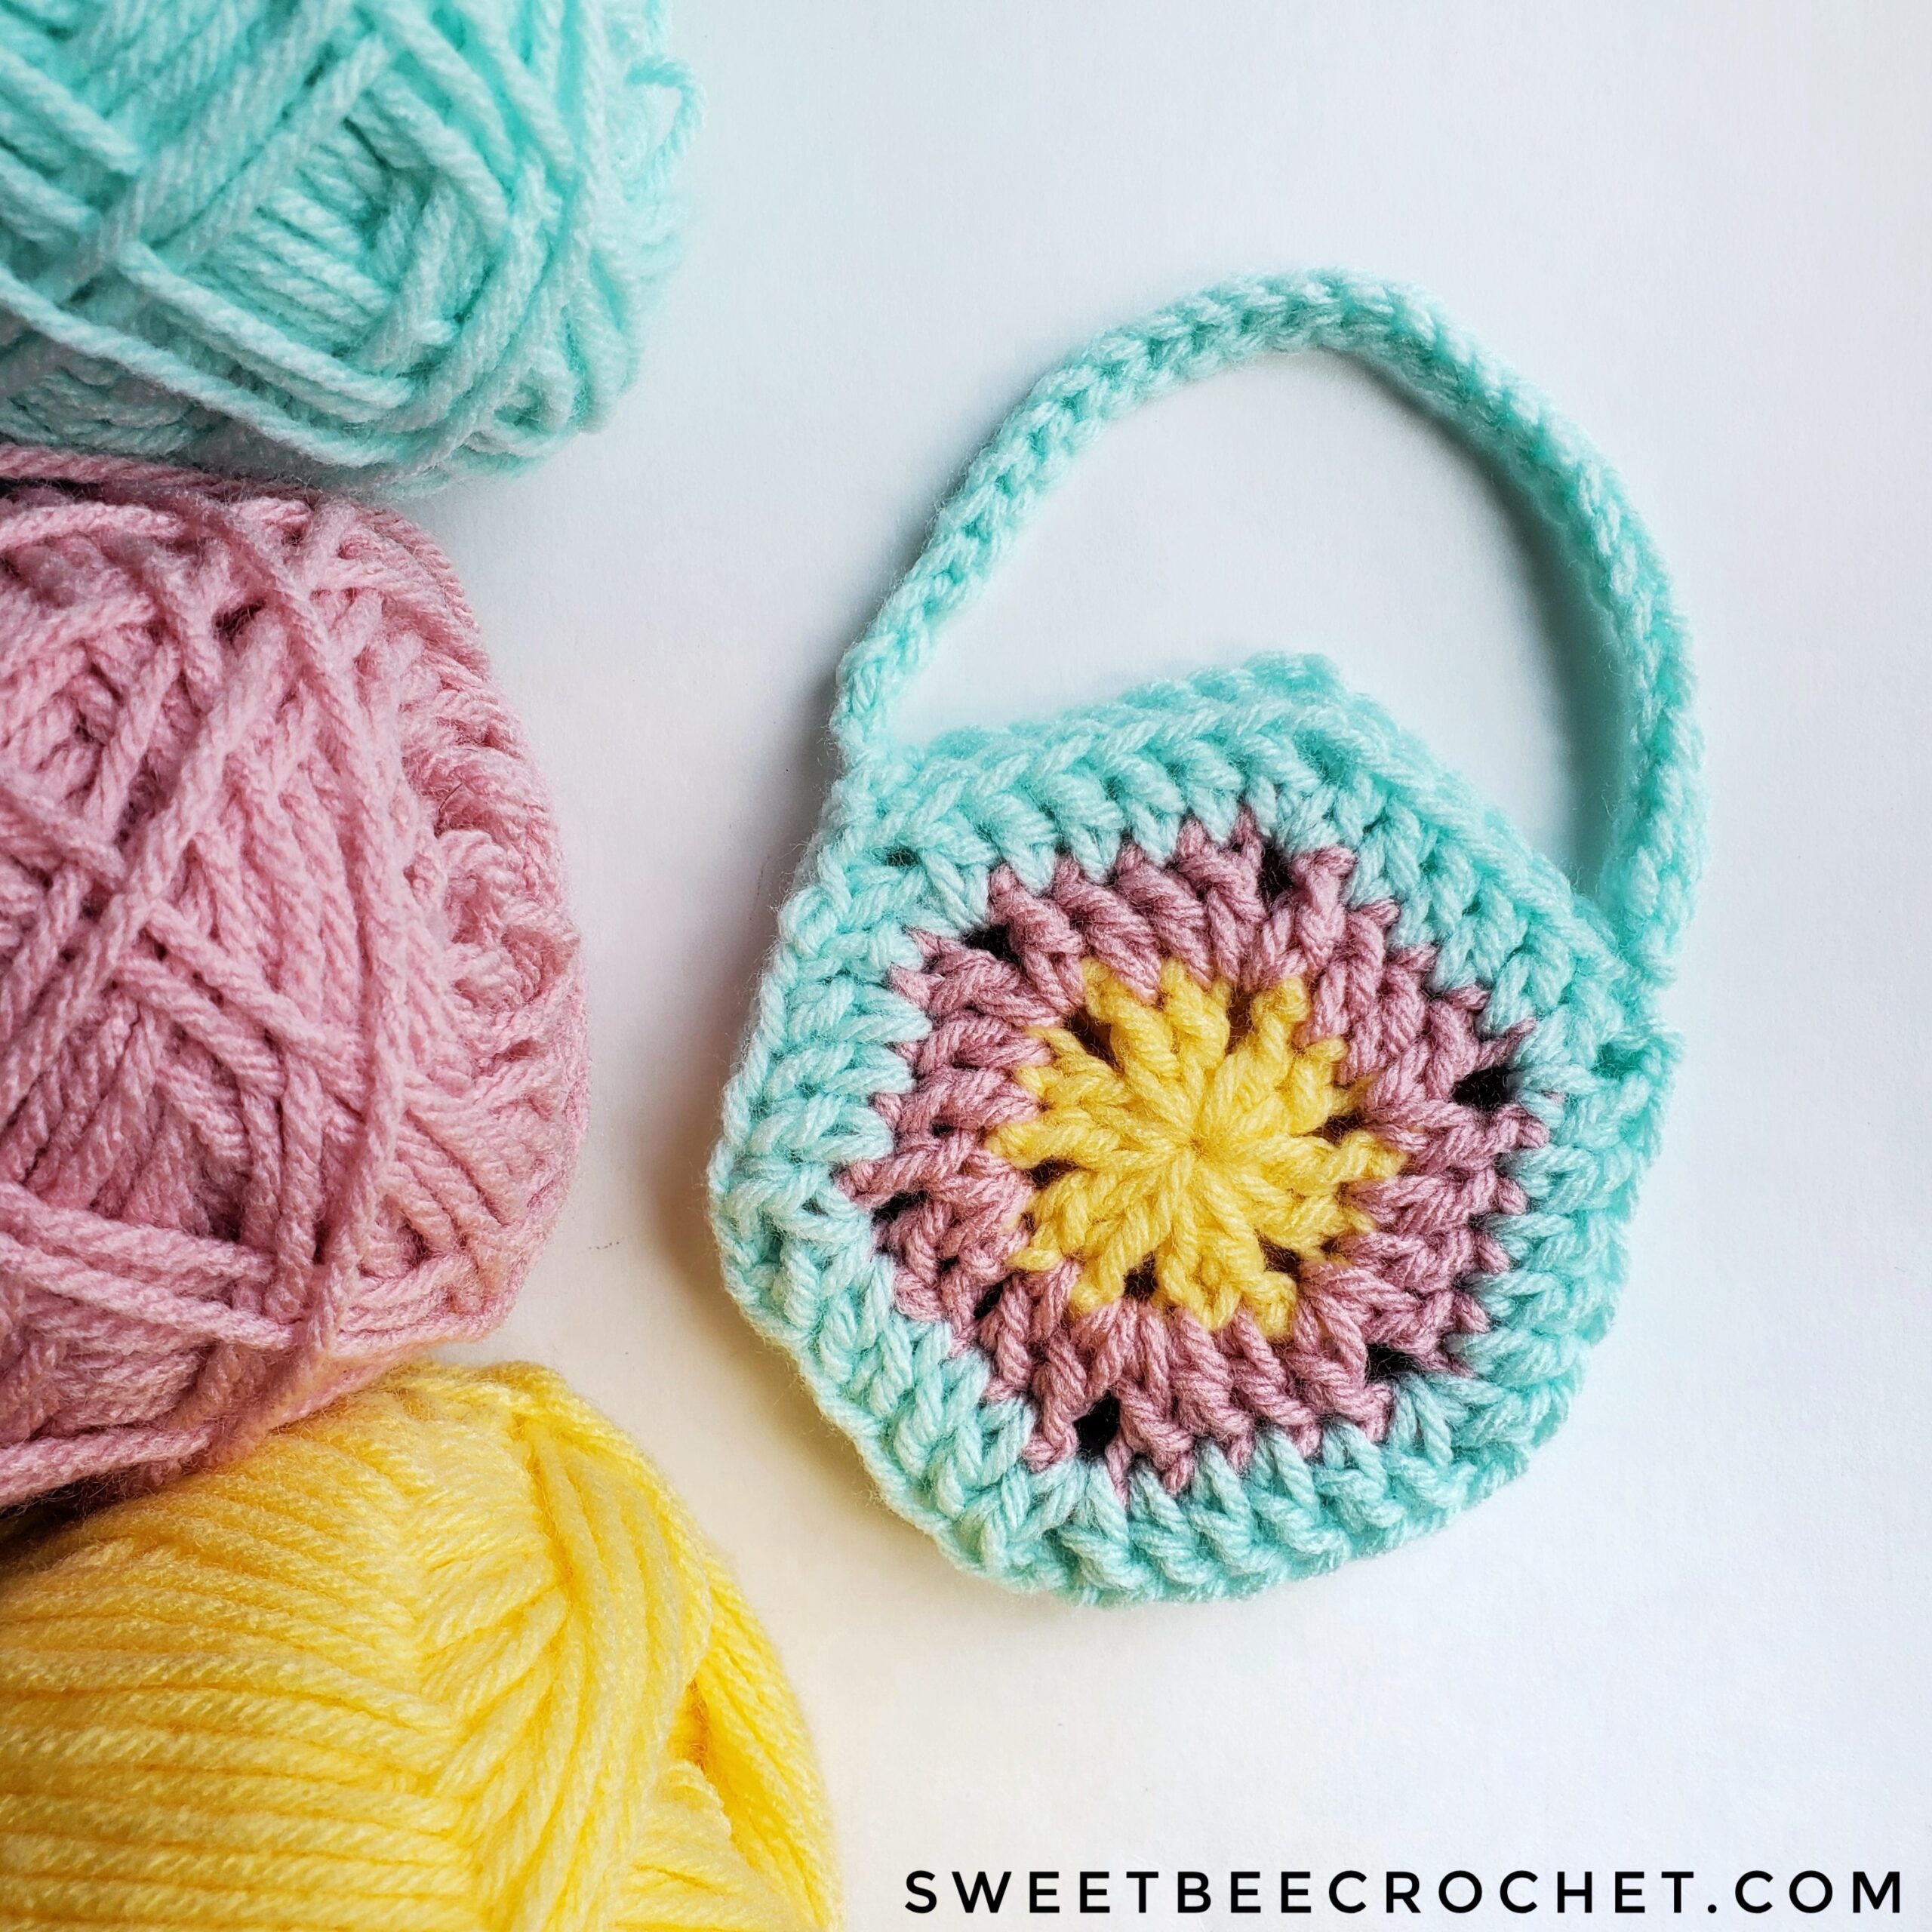
– Worsted weight yarn of any fiber (I used Red Heart Super Saver Ombre for the tutorial photos. The grey hexagons seen in other post photos are made with Bernat Satin)
– A crochet hook that is appropriate for the yarn selected (4mm-6mm works best). I used my 4mm Furls Streamline Swirl Cream.
– Scissors
– Yarn needle (I love these bent tip needles for easy weaving of ends)
Terms:
SS – Slip Stitch
CH – Chain
DC – Double Crochet
Tutorial Notes:
– The CH 2 at the beginning of each round counts as a stich. For the purposes of counting and pattern descriptions in the photos, it will be assumed as a double crochet stitch.
– This tutorial is written in US terms (find a stitch conversion chart here)
– For this tutorial, a “cluster” will refer to a group of individual DC stitches in between each CH 2
Pattern:
Begin by making a magic circle. Yo may prefer to CH 3 and slip stitch into the first chain to make a circle instead.
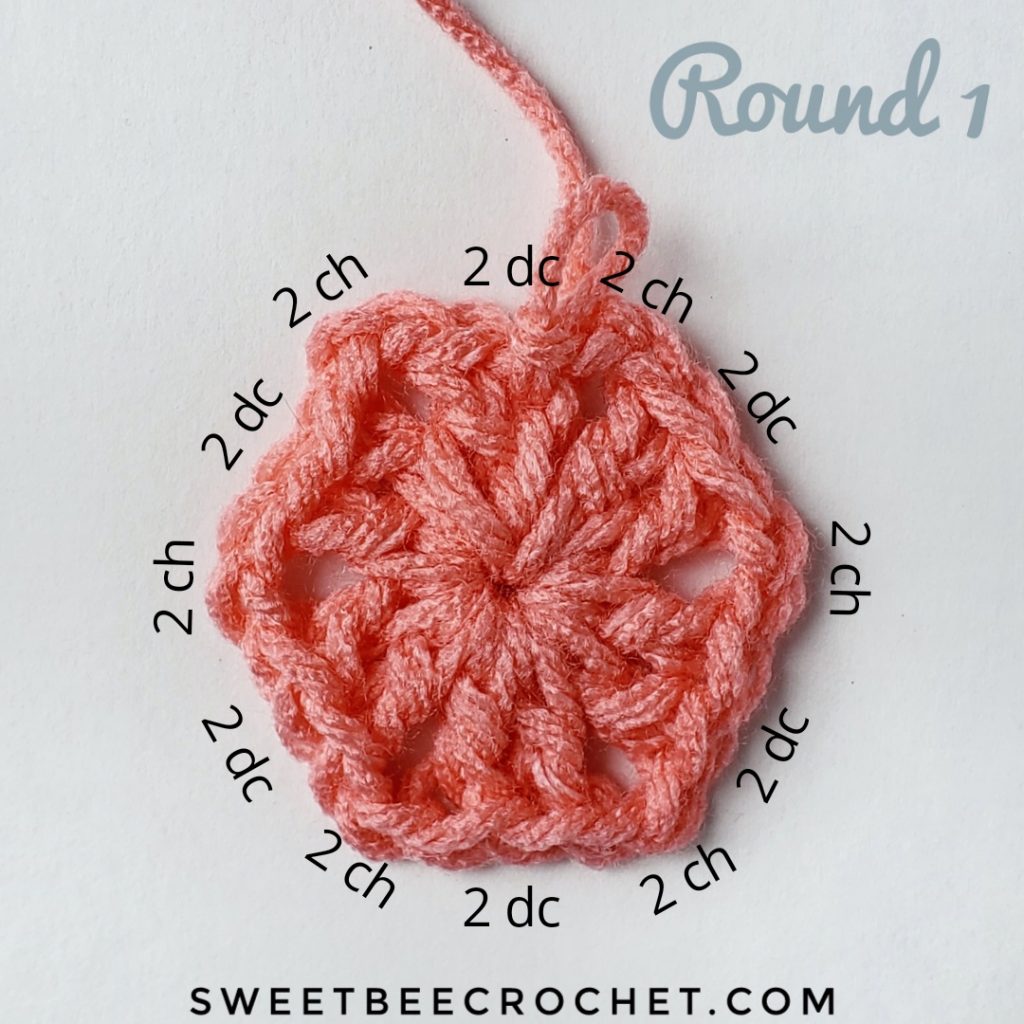
Round 1:
CH 2 (counts as first dc) and make 1 DC into your circle.
CH 2 and make 2 DC stitches.
CH 2 and make 2 DC stitches.
Continue this sequence 3 more times. Finish your final CH 2 and complete a SS into the top of your beginning CH 2.
Your first round should have a total of 6 DC clusters (with 2 DC in each) and 6 CH 2 sections
Round 2:
CH 2 and place 1 DC into the next stitch. In the next chain space, complete 1 DC, CH 2, 1 DC.
Continue by placing 1 DC into the next stitch. You might need to shift your previous DC over to see this stitch space clearly (see photo below).

Place 1 DC into each of the next two stitches. In the next chain space, complete 1 DC, CH 2, 1 DC. Continue by placing 1 DC into the next stitch (remember you might need to shift the previous dc over to see it).
Continue with the full instructions above 4 more times. Finish off with your last DC in the chain space and SS into the top of your beginning CH 2.
Your second round should now have a total of 6 clusters (each containing 4 DC stitches) and 6 CH 2 spaces.

Round 3:
CH 2. Place 1 DC into the next 2 stitches. In the next chain space, complete 1 DC, CH 2, 1 DC.
Continue by placing 1 DC into the next stitch. Place 1 DC into each of the next 3 stitches. In the next chain space, complete 1 DC, CH 2, 1 DC.
Continue the full sequence 4 more times. After completing your final “DC, CH 2, DC” segment, place 1 DC into the next stitch and SS into the top of your beginning chain.
Your third round should have a total of 6 clusters (each containing 6 DC) and 6 CH 2 spaces.

Sometimes it’s tricky to remember the proper stitch placement, especially in the chain spaces. The first and second double crochets in the chain spaces are part of your overall count in the DC clusters. The first double crochet in the chain space is actually the last of that cluster. The second double crochet in the chain space sequence is the first dc of the next cluster.
And as you can see, each DC cluster increases by two in every round:
Round 1 – Clusters of 2 DC
Round 2 – Clusters of 4 DC
Round 3 – Clusters of 6 DC
This pattern goes up to 3 rounds but you can easily continue the method of this tutorial to make a hexagon with as many rounds as you would like!
Ideas For Use:
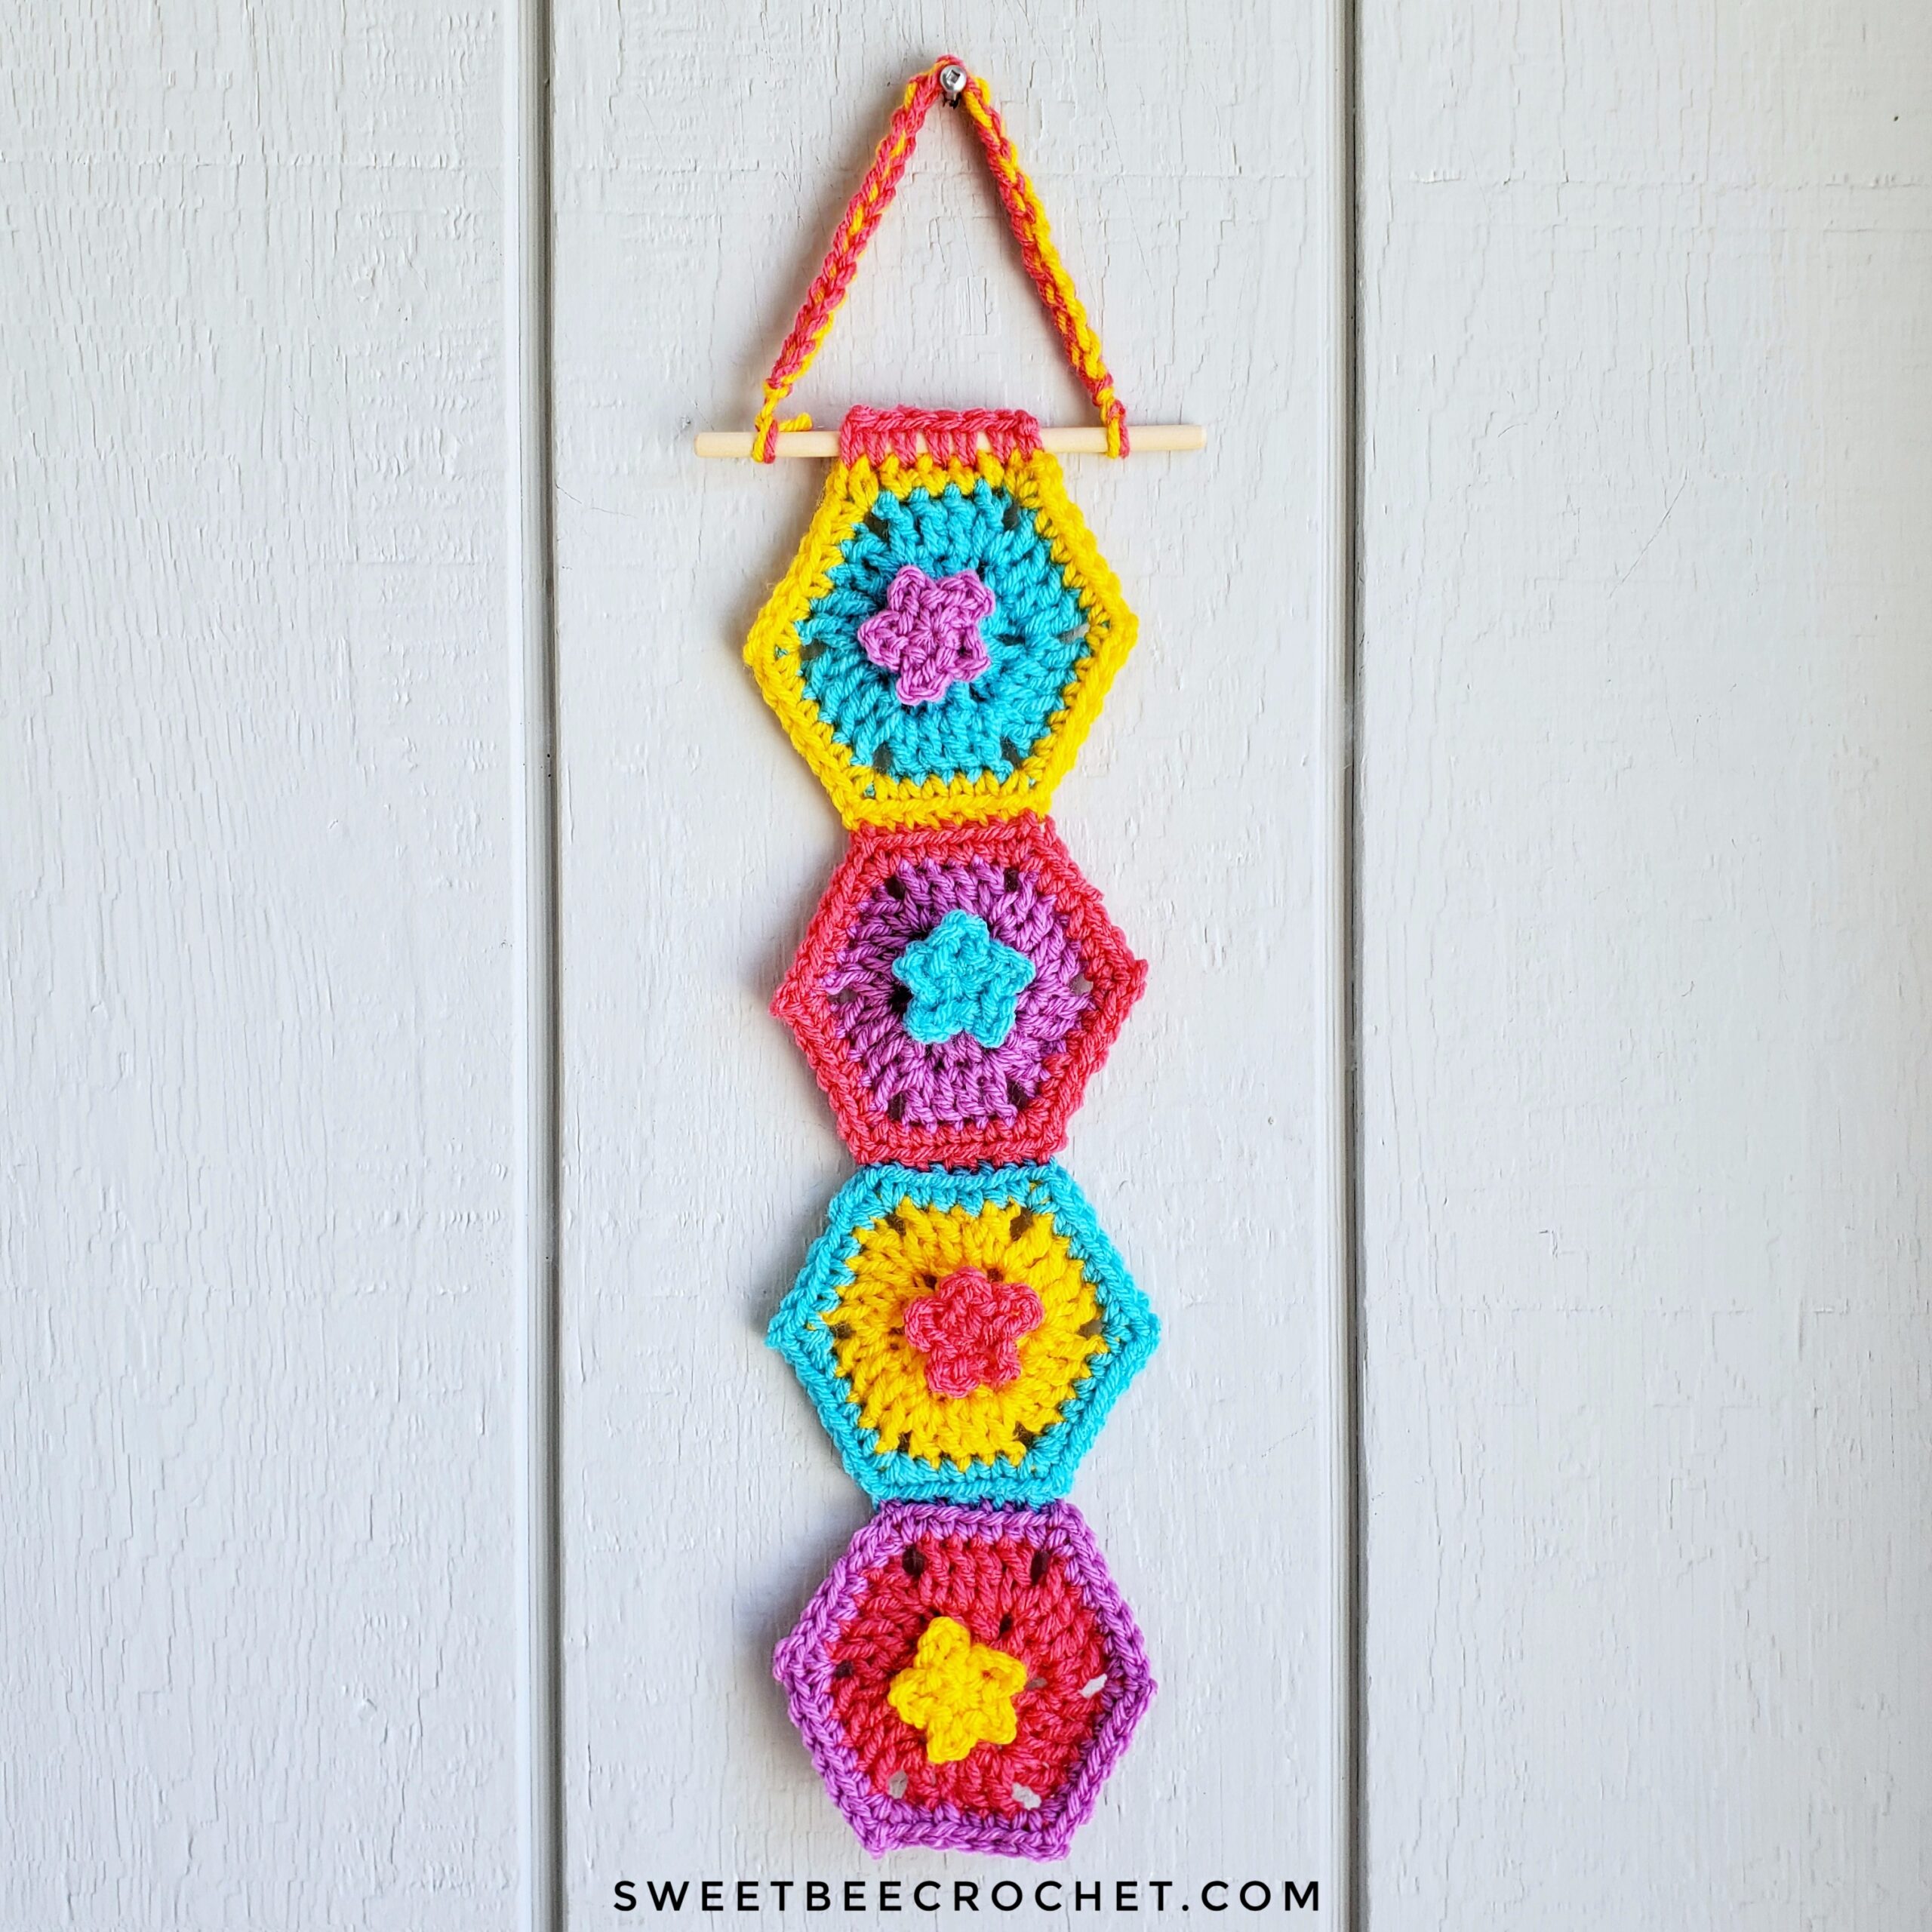
– Stitch a few together to make placemats or a table runner
– Stitch a lot together to make a blanket
– Make a few and stitch them together in a row to make a scarf
– Make colourful hexagons as motifs and sew them to clothing or bags
– Use cotton yarn to make hexagons and create a set of 4 for a cute coaster option
Click the images below to explore my free hexagon patterns:


Now you know how to crochet hexagons! Did you find this tutorial helpful? Be sure to pin this post to your favourite crochet Pinterest board and share with your crochet buddies!
If you’re looking other project ideas, head over to the Free Pattern section of my blog for some quick and easy crochet patterns. Happy crocheting!

Thank you so much for sharing — I can understand the directions very well. How would you join the hexagons? Thank you again, Barbara in Cleveland, TN
Hi Barbara! I’m glad you found the tutorial helpful. When I join my hexagons, I use a simple whip stitch through the back loops. It creates a nice clean appearance and holds up well. Perhaps I’ll add that to my list of future tutorials! Thanks for checking out the blog, have a great day!
Barbara,
There are several videos on YouTube to attach your hexagons. The one I like to use is a Zigzag slip stitch. Here is the video site, check it out. https://www.youtube.com/watch?feature=youtu.be&v=V3-zQA2qjLs&app=desktop
Pingback: Granny Square Tutorial - Sweet Bee Crochet
Pingback: The Ultimate Beginner Crochet Resource - Sweet Bee Crochet
Pingback: Holiday Hexie Centrepiece - Free Pattern - Sweet Bee Crochet
Pingback: Free Crochet Pattern - Little Hexie Bag - Sweet Bee Crochet
Pingback: Red Heart Super Saver O'Go - Yarn Review - Sweet Bee Crochet
I would like to print this off. I can follow the instructions best if it’s printed and I can read it several times.
Why can’t I print it?
It’s exactly what I want to made to finish up a big project my daughter gave me.
Thank you and Blessings,
Karen
Hi Karen! I do have a free .PDF available on Ravelry for this. Please follow this link to access the printer friendly version: https://www.ravelry.com/patterns/library/how-to-crochet-hexagons
Rebecca