
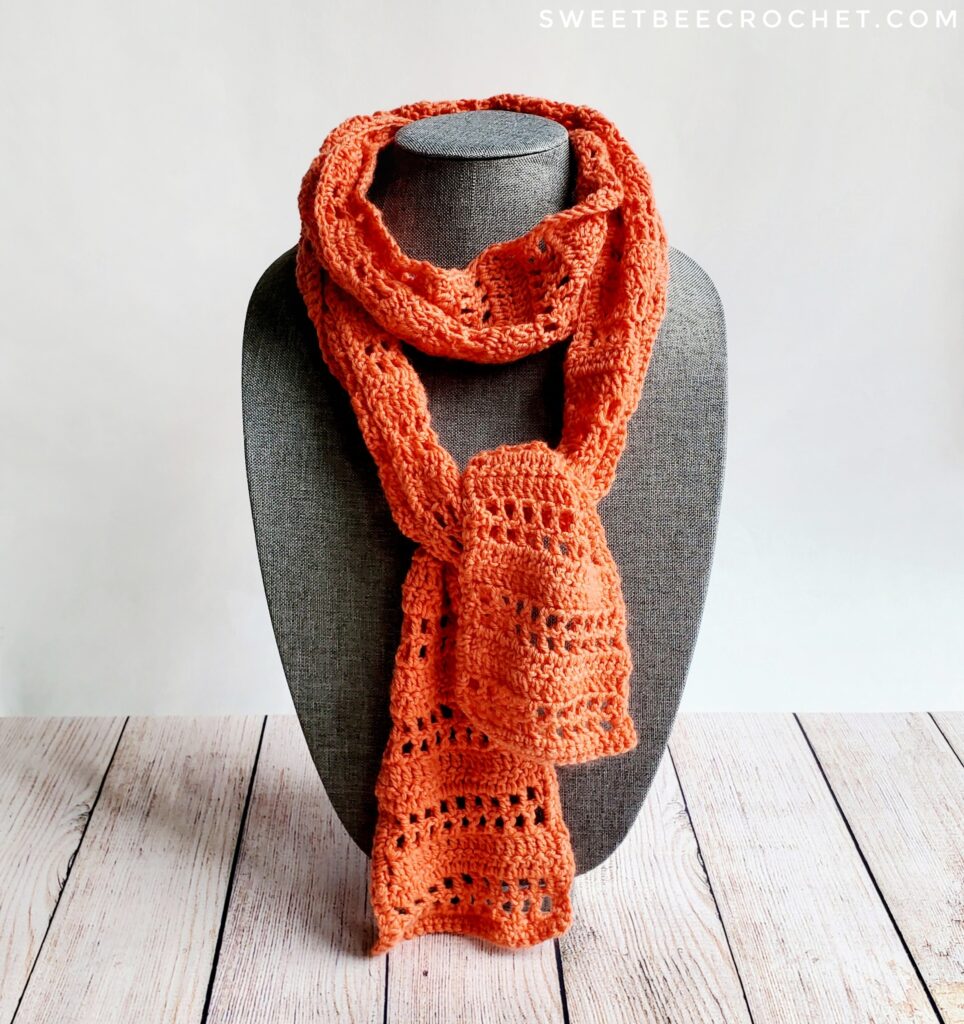
A spring scarf is a wonderful accessory to have on hand. While the warmer weather makes a return, the chilly temperatures often stick around (especially in the early morning and evenings). The Spring Day Scarf is a lightweight design that uses a simple filet pattern to create beautiful and comfortable accessory to your spring wardrobe.
For this pattern, you will need a 4mm and approximately 248 yards of super fine weight #1 yarn. If you haven’t worked with that yarn weight before, this would be a wonderful introduction!
Find all the details and the pattern below…
This is a pattern is available for free here on my blog. An ad-free, neatly formatted, printer friendly version is also available for purchase in my Etsy and Ravelry shops. Click the buttons below to take you directly to the shops!


You may sell items completed from this pattern but please provide credit back to Sweet Bee Crochet and if possible, link back to the pattern location. You may not sell this written pattern, use my photos without consent, or create video tutorials using my pattern. You may not use my photos to sell your completed items.

Notes:
– This pattern is written in US terms (find a stitch conversion chart here)
– This pattern is written using weight #1 yarn and a 4mm hook. You are welcome to use another yarn weight and appropriate sized hook to crochet this design. However, please note that the yardage, drape and size could be different than what is written in this pattern
– Due to the design, a solid colour yarn might display the stitches more clearly
– Gauge is 2×2 inches = 4 rows of DC, each containing 10 stitches
– Turning chain does not count as a stitch throughout except for the edging
– Finished scarf measures approximately 4 inches wide and 62 inches long.
– The length of this scarf could easily be increased by continuing the row 2-5 repeat. Once you reach your desired length, compete rows 134-136 before moving onto the edging
– For best finished results, this scarf might benefit from a simple blocking
Materials Needed:
– Approximately 247-248 yards of super fine #1 yarn (I used Sugar Bush Itty-Bitty in “Fiery Sky”)
– 4mm hook
– Yarn needle
– Measuring tape
– Scissors
Stitches:
SK – Skip stitch
CH – Chain
SS – Slip Stitch
SC – Single Crochet
DC – Double Crochet

Pattern:
Begin with CH 20
Row 1:
Into the second CH from your hook and each stitch across, make 1 SC. CH 2 and turn.
(19 SC stitches)
Rows 2-3:
Into the first stitch, place 1 DC. CH 1 and SK the second stitch. *Into the next stitch, place 1 DC. CH 1 and SK the next stitch.* Repeat from * to * 7 more times. Into the last stitch, place 1 DC. CH 2 and turn.
(10 DC stitches, 9 CH 1 spaces = 19 stitches)
Row 4:
Place 1 DC into each stitch and CH 1 space across. CH 2 and turn.
(19 DC stitches)
Row 5:
Into the first stitch and each stitch across, place 1 DC. CH 2 and turn.
(19 DC stitches)
Repeat rows 2-5, 32 more times ending on row 133. Do not fasten off.
Row 134:
Into the first stitch, place 1 DC. CH 1 and SK the second stitch. *Into the next stitch, place 1 DC. CH 1 and SK the next stitch. *Repeat from * to * 7 more times. Into the last stitch, place 1 DC. CH 2 and turn.
(10 DC stitches, 9 CH 1 spaces = 19 stitches)
Row 135:
Into the first stitch, place 1 DC. CH 1 and SK the second stitch. *Into the next stitch, place 1 DC. CH 1 and SK the next stitch.* Repeat from * to * 7 more times. Into the last stitch, place 1 DC. CH 1 and turn.
(10 DC stitches, 9 CH 1 spaces = 19 stitches)
Row 136:
Into the first stitch and each stitch across, place 1 SC.
(19 SC stitches)
Edging:
(I find fastening off and re-joining the yarn in the middle of an edge provides a neater finish for the border. If you have a different method for working your border, please feel free!)
Join yarn into the middle of any edge with a SS and CH 1 (CH 1 counts as 1 SC). Evenly place 1 SC into each stitch, around all edges. Make 1 SC, CH 2, 1 SC into each corner space. SS into the beginning CH 1, fasten off and weave in all ends.

Great job! Your Spring Day Scarf is complete! For more fun and creative designs, be sure to check out the Free Pattern section of my blog. Ad free, printer friendly versions can be found in my Etsy and Ravelry shops. Happy Crocheting!
Hey there. I asked you the other day if you had a gat to match this scarf. I decided to try and make one. Would like your opinion? Can’t post picture here. Where should I attach a picture?
It was great to connect with you on Facebook. Thanks for sharing your beautiful photos with me!