
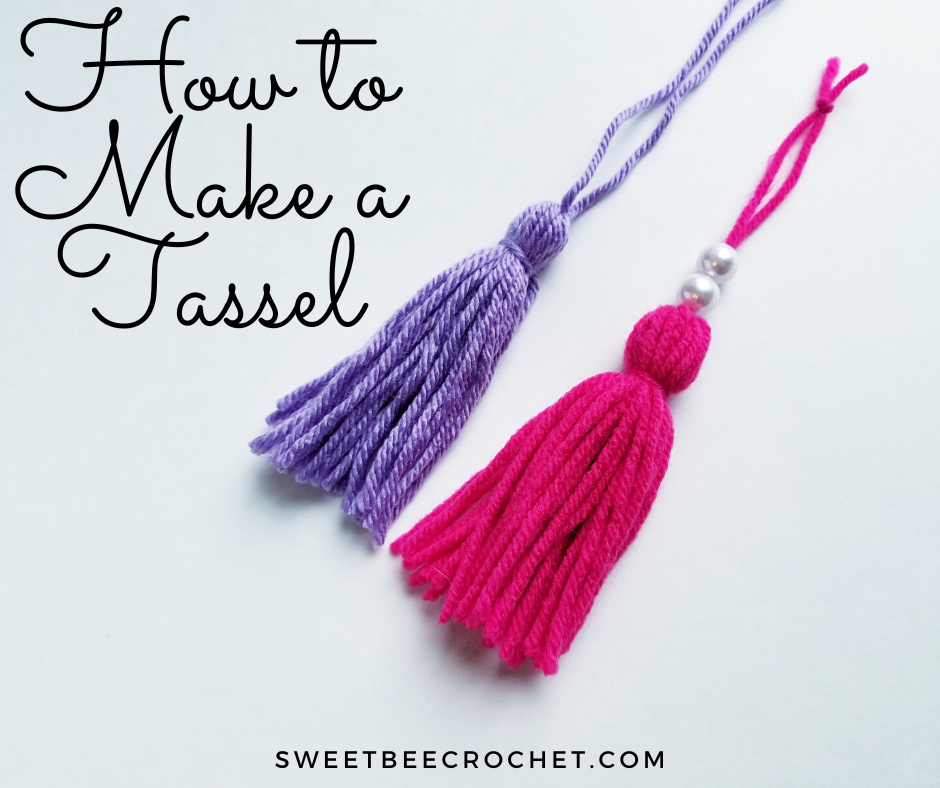
Tassels are a great way to add some embellishment and fun to your projects. Add them to the corners of your pillows and blankets, use them in ornaments or on bags or attach them to garments like scarves and shawls to add a bit of whimsy. Tassels also look great as garland accents or simply as cute little pieces of décor. You can make them from pretty much any weight or fiber of yarn or use embroidery thread for a more dainty appearance. This tutorial will give you step by step written and photo instructions on how to create tassels for your own projects.

You Will Need:
– Yarn (I used worsted weight)
– Scissors
– Yarn needle
– Small crochet hook (3.5mm or smaller depending on yarn weight)
– Cardboard
– Craft beads (optional)
Step 1:
Prepare your cardboard by cutting out a rectangle. The bigger the length, the longer your tassel will be. I find a cut piece that is approximately 4.5 inches long to be an average size for most projects, however, you can customize the size of your cardboard to accommodate whatever size tassel you need. For this tutorial, I’ll be using the size mentioned above but please use what you size you like.

Step 2:
Begin by cutting one piece of yarn that is approximately 12 inches in length and set it aside for later.
To begin your tassel, line up your yarn to the bottom of your cut cardboard. It doesn’t have to be perfect; that’s why we trim at the end!

Step 3:
This is an optional step and some people might find it helpful so I will include it here. Place the cut piece of yarn you prepared at the beginning underneath the main tail. This will be what you gather up at the top to knot. It holds the tassel in place and essentially allows you to attach it to other projects. This extra piece can sometimes be tricky to keep from getting twisted in as you wrap your yarn around the cardboard, so you’ll need to be a little careful. This step is not necessary and this piece can be added in later if you wish to skip this step.

Step 4:
Wrap your yarn around the cardboard as many times as you like. For worsted weight yarn and at a tassel this length, I do about 20 wraps. The more you do, the more full your tassel will be. It’s all personal preference and what will accent your project best. Once you have wound your yarn around, cut it at the bottom of the cardboard so it is no longer attached to the skein or ball.
If you chose to skip step 3, this is where you will add that piece mentioned. Take the cut piece of yarn you prepared at the beginning and attach it to your yarn needle. Push it through between the top section of your wound yarn and the cardboard piece making sure to stay underneath all the strands. Gently tie one knot at the top to hold everything in place. It can be tightened and adjusted later.
Take your scissors and cut along the bottom portion of the yarn. This will separate the front and back and allow you to pull your cardboard out.

Step 5:
Tighten your knot at the top of the tassel and secure it while making sure it is even and centered as seen in photo A. Cut another piece of yarn from your ball or skein that is approximately 6 inches long and carefully place it behind your tassel about 1/2 an inch from the top as shown in photo B. Pull each side around and tie a tight knot in the front as displayed in photo C.

Step 6:
Take your small crochet hook and very carefully, insert it next to the knot you just made with the yarn piece you wrapped around. Pull the two pieces of the knot tails through to hide them within the tassel.

Step 7:
Gently pull on the end of your tassel to even out all the yarn pieces. Take your scissors and trim the ends to even them out. Once your have finished and you are happy with the length of your tassel ends, you have some options. You can tie a knot in the top two strands to hang it or you can add some beads/buttons/etc to provide some pop and extra embellishment. Or keep the two strands loose so you can add them to another project later.

And there you go! Tassel made and ready to use. I hope you found this tutorial helpful and easy to follow. If you enjoyed this post, you might also be interested in these tutorials. Happy crocheting!


Pingback: Vintage Noel Ornament (Free Pattern) |
Pingback: Granny Bobble Wall Hanging - Free Pattern - Sweet Bee Crochet