
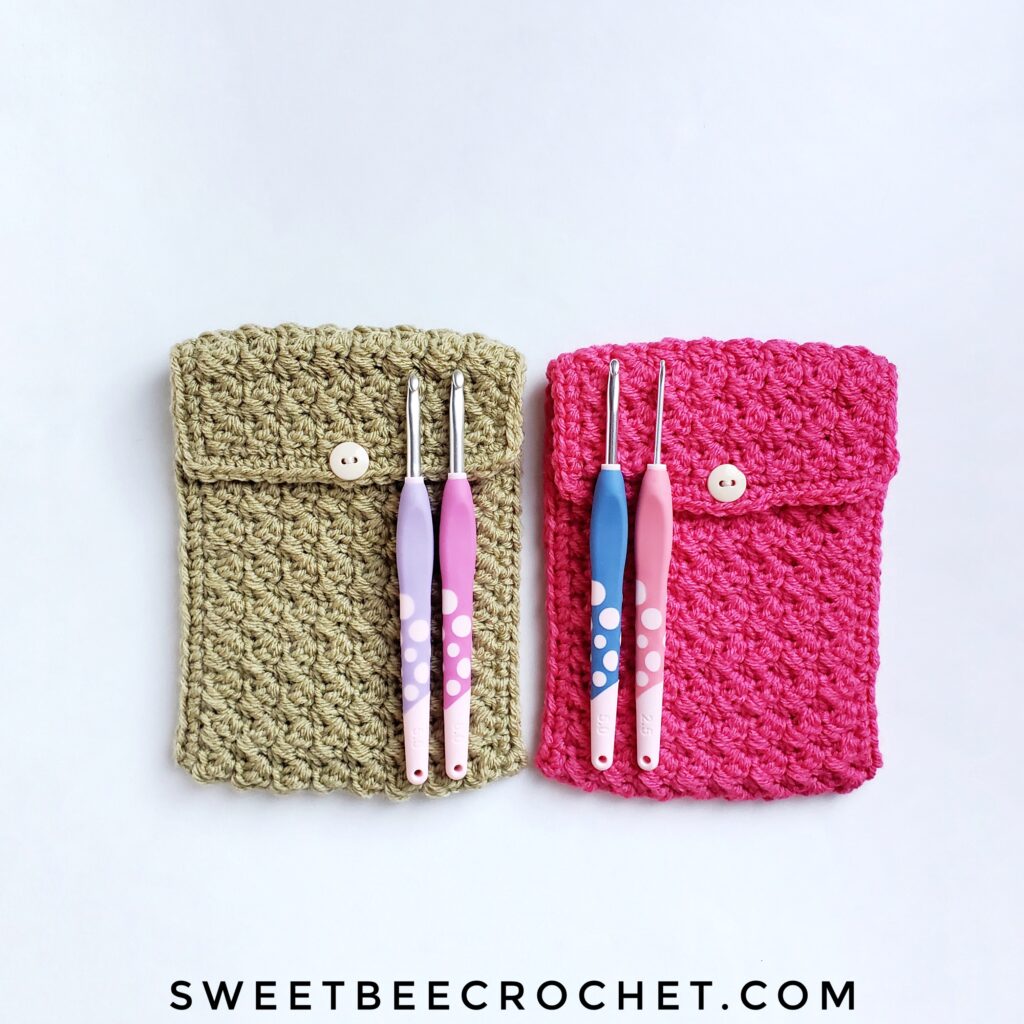
After a few requests, I’m happy to share a new, larger version of my Suzette Hook Pouch! The original design (here) is perfectly lovely for stashing away a one to two hooks but there’s room for more in the larger version!
The pattern uses the same pretty suzette stitch and works wonderfully to keep your crochet hooks together in your project bag.
Get the free pattern below…

This pattern is available for free here on my blog. An ad-free, neatly formatted, printer friendly version is also available for purchase in my Etsy and Ravelry shops. Click the buttons below to take you directly to the shops!


You may sell items completed from this pattern but please provide credit back to Sweet Bee Crochet and if possible, link back to the pattern location. You may not sell this written pattern, use my photos without consent, or create video tutorials using my pattern. You may not use my photos to sell your completed items.
**Tag me on Instagram (@sweet_bee_crochet) to show off your finished piece!**


Notes:
– This pattern is written in US terms (find a stitch conversion chart here)
– Gauge is not important for this pattern
– Finished pouch measures approx. 5 ½ x 7 ½ inches
– Turning CH 1 does not count as a stitch
– Special stitch tutorial for the suzette stitch is included below
– Extra photos can be found on the last page for optional printing
– This pouch will not protect your hooks from breaking. Please keep fragile hooks properly stored. This pouch is to keep your hooks together in your project bag
Materials Needed:
– Approximately 96 yards of worsted weight yarn. I used WeCrochet Brava.
– 5mm hook
– Yarn needle
– Scissors
– Measuring Tape
– One 16mm button
– Needle and thread appropriate for sewing on the button
Stitches:
SK – Skip stitch
SS – Slip Stitch
CH – Chain
SC – Single Crochet
DC – Double Crochet
Special Stitch Tutorials:
Suzette Stitch – One single crochet and double crochet are placed into the same stitch. Skip the next stitch. Repeat. After the last skipped stitch of the row, place 1 SC.
Detailed Tutorial: https://sweetbeecrochet.com/suzettestitch/

Pattern:
CH 18 and begin row 1 in the 2nd CH from your hook.
Rows 1-50:
Into the first stitch, *place 1 SC and 1 DC. SK the next stitch*. Repeat from * to * 7 more times. Place 1 SC into the last stitch. CH 1 and turn.
(8 DC stitches, 9 SC = 17 stitches)
Row 51:
Into each of the first 8 stitches, place 1 SC. CH 3 and SK the next stitch (this will be the button hole). Into each of the remaining 8 stitches, place 1 SC. Do not CH 1 and turn. The rectangle should measure approximately 16 inches long and 5 inches wide.
(16 SC stitches, 1 CH 3 space)
Edging:
Into the same stitch as the last SC, place 2 more SC. This will create a corner curve around to the next edge. Evenly place 1 SC around all edges working 3 SC stitches into each corner stitch space. When you reach the CH 3 button-hole, place 1 SC into the CH 3 space. Once you have returned to the beginning of your edging, SS into the 2nd SC of your first corner. Fasten off and weave in ends.
With the right side down (back of the stitches are now facing you), fold up the bottom so the pouch measures approximately 6 ½ inches in length (photo A). Make sure the button hole is at the top.

Seaming:
Seam your edges (photo B) using the method of your choice (to see an example of how I did mine, see photo C) Fasten off and weave in your ends.


Button:
Sew the button in the appropriate spot that lines up with the button-hole when the flap is folded over (photo D).

I hope you enjoyed this pattern. For more free designs, please click the banner below. Happy crocheting!
